Purchasing a new camera often involves a mixture of excitement, happiness and occasionally frustration, especially if you are coming from a different camera brand. In the last few years, no company has continued to push the boundaries of what we thought was possible as Sony has with their full frame mirrorless & APS-C cameras. Because of this, many photographers are flocking to Sony and finding themselves not only trying to learn a new camera but a menu system as well.
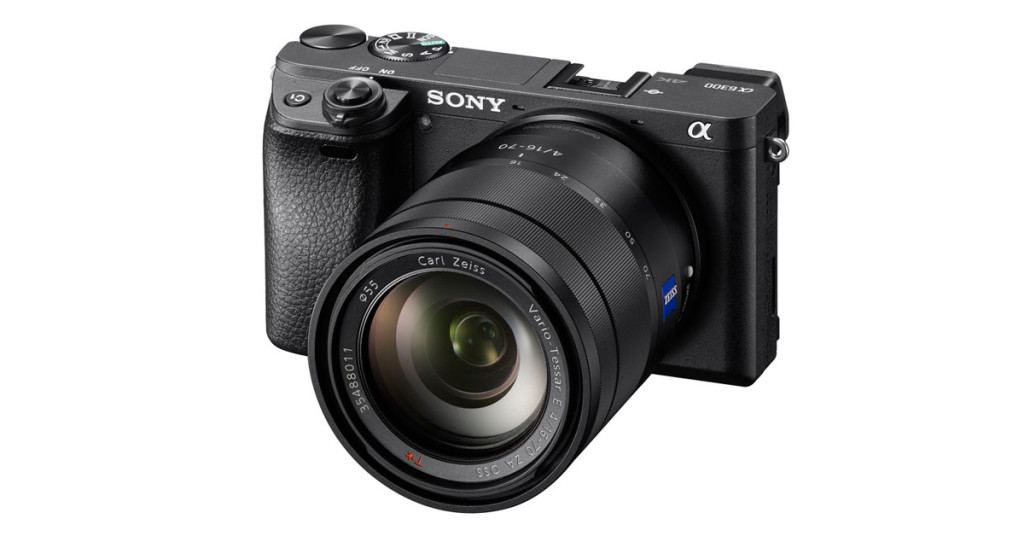
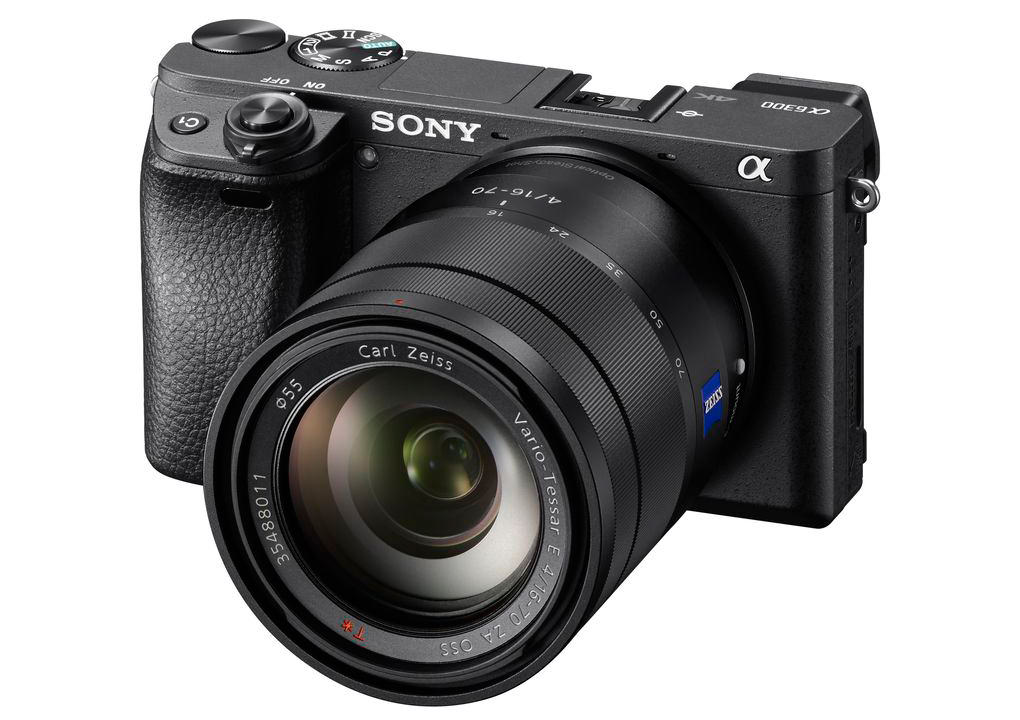
With the release of the Sony a6300, the successor to the most popular mirrorless camera sold around the world (The Sony a6000), many of you might find yourselves in a similar experience. Even Sony shooters might be surprised to find all the new features and functions of the a6300. So no matter if you are brand new to Sony or simply adding the a6300 to your current gear setup, I have compiled a list of 25 of my favorite tips/settings to help you get the most out of your new brand new Sony a6300. I will be working on my full in-depth review of the a6300 while in Patagonia at the end of this month, but hopefully this will keep most of you satisfied until I get a chance to wrap that up.
Let the fun begin!
Sony a6300 General Tips
Here is a collection of tips and tricks to help you get the most out of your Sony a6300 mirrorless camera…
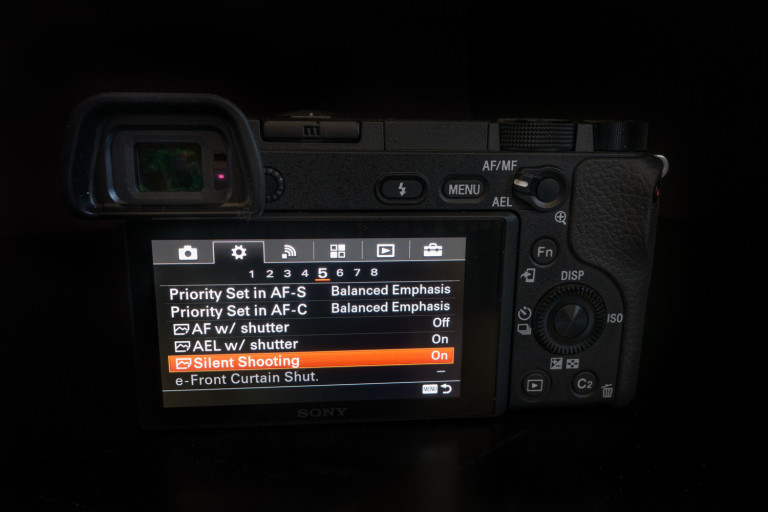
Be a Ninja With The New Silent Shooting Mode
One of the best features found in the a7II series of full frame cameras (a7II, a7R II, a7S II) is the ability to have a truly silent shooting mode. This isn’t like the silent mode found on the latest Canon DSLRs either. It is truly silent…it doesn’t make a sound of any kind. The trade-off? You can’t shoot with “High” or “Continuous High” drive modes. In fact, you can only use the “Continuous Shooting: Lo” mode so don’t expect to be able to shoot with high FPS in the mode. Additionally, the following functions are not available for you to use in tandem with “Silent Mode”: Flash shooting, Auto HDR, Picture Effect, Picture Profile, Long Exposure NR, e-Front Curtain Shutter, S. Auto Img. Extract, Bulb shooting, Multi Frame NR. That being said, it is great when you don’t want to scare off an animal or insect, or you wish to be a little more incognito.
Use Auto ISO Correctly in Aperture Priority Mode
One feature that I loved using as a DSLR shooter was the ability to set a minimum shutter speed with Auto ISO. Why is this important? Imagine using the Aperture Priority Mode to capture an image of a person. You set the aperture to f/2.8 because you want some decent bokeh (background blur) and you know that you want to use the lowest ISO possible (to avoid noise and to get the cleanest looking colors). The problem is that light is fading and you know that your shutter speed is going to have to drop in order to capture enough light in your image as time goes on. By setting a minimum shutter speed (of say 1/60th of a sec) and turning on Auto ISO, you force the camera to only increase the ISO if the shutter speed drops below your set limit. This way you don’t have to worry about camera shake, because your shutter speed will never go below your minimum set limit.
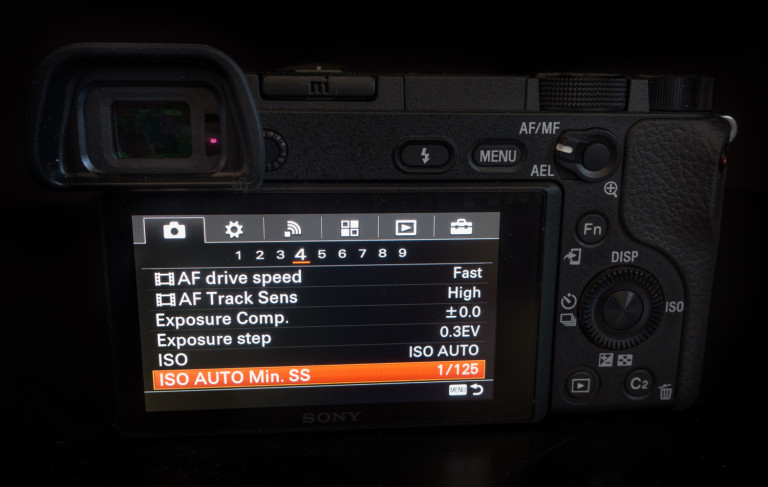
To enable this feature, jump into the camera’s menu system and find the Camera tab (far left). Under Section 4 you will find “ISO AUTO Min. SS”. This setting is adjustable when you are already in either the Aperture Priority mode. Click on the setting and then select the minimum shutter speed that works for you. If you are using a wide angle lens, you can try 1/60th or even 1/15th of a second, however if you are using a telephoto lens, I recommend using a faster shutter speed, such as 125 or 250 to get the best results.
Turn Off Long Exposure NR & DRO/Auto HDR
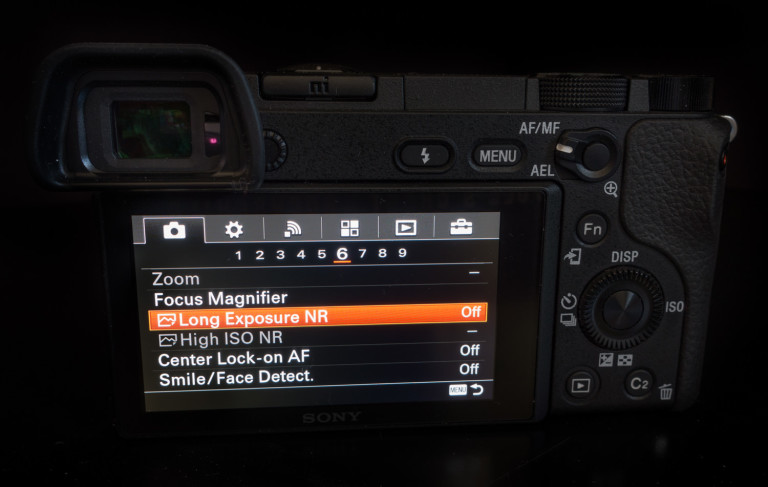
To find DRO, navigate to the Camera tab in the menu system and find Section 5. Here you will see “DRO / Auto HDR.” Set it to “Off”. In the same Camera tab, move to Section 6 to find “Long Exposure NR” and set it to “Off” as well.
To find DRO, navigate to the Camera tab in the menu system and find Section 5. Here you will see “DRO / Auto HDR.” Set it to “Off”. In the same Camera tab, move to Section 6 to find “Long Exposure NR” and set it to “Off” as well.
Use Grid Lines To Help Your Compositions
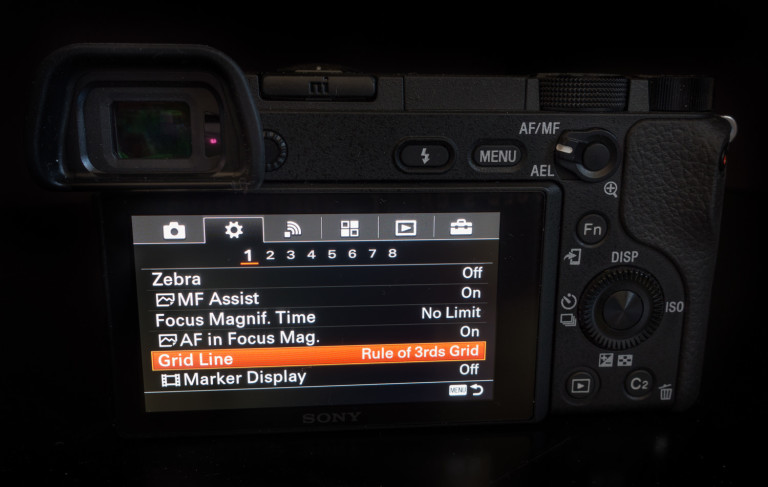
While the Sony a6300 now has the much requested “Horizon Level” built into the system (it was missing from the a6000), I still find the use of Grid Lines on the Viewfinder and rear LCD to be very helpful. You can set it to the “Rule of Thirds” to help you with subject placement as well as help you quickly capture an even horizon as you line up one of the grid lines with your horizon. While simple, I do love this feature.
Use Back Button AF
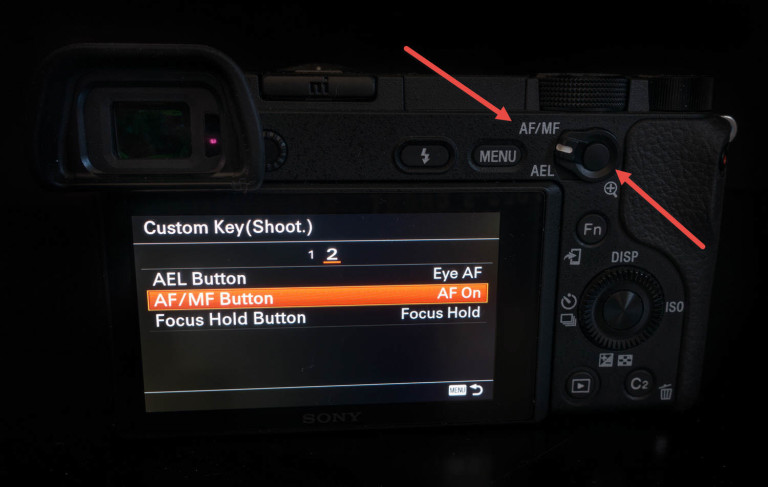
Many photographers coming from DSLRs (especially wildlife & sports photographers) have a fondness of separating their shutter release button from their focus button. Why? Because it is very easy to accidentally take an image when all you wanted to do was achieve focus. This can cause you to miss “THE” shot if it happens at an inopportune time. By keeping them separate, you can make sure your focus is locked in before pressing the shutter button, which you know will simply take the photo and not try to find focus once again.
Use DMF to Mix Auto Focus and Manual Focus
While the Sony a6300 has a crazy good AF system that most of you will enjoy right out of the box, there is something to be said for the nostalgic act of using manual focus in particular situations, such as street photography or occasionally when working from a tripod. Luckily the Sony a6300 allows you to effectively do both with the help of four settings used in tandem. DMF Focus Mode (Direct Manual Focus) enables you to use the cameras AF system to get you started with an initial focus point while simultaneously allowing you to use MF to dial sharpness as you see fit. With “Back Button AF” enabled (see the above tip), you simply hold down the rear AF button to achieve initial focus, then start dialing in focus using your lenses focus ring. If you have “MF Assist” set to “On”, the rear LCD (or viewfinder) will instantly zoom into your image making it easier to determine when you have achieved your desired focus. This along with the use of “Focus Peaking” makes this process even easier. It works by showcasing a small color overlay (red, white or yellow) across your scene when things begin to get in focus. This is all done while continuing to hold down the “Back Button AF”. Once you are ready, just press the shutter release button and the image is captured.
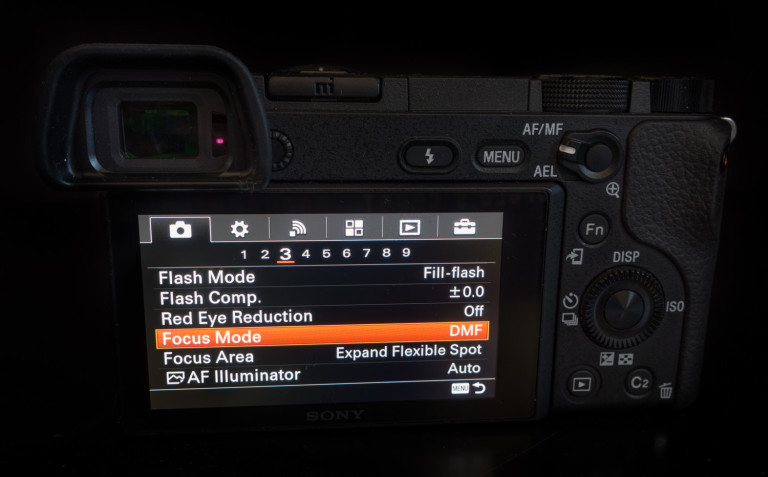
While this might sound like a lot of steps, in reality it will take just a second or two once you have practiced. So which settings need to be adjusted? Once you have “Back Button AF” enabled, you will want to jump in DMF mode, found in the “Focus Mode” setting. This can be changed from the default Fn button or via the camera’s menu system under the Camera tab (far left) under Section 3. “MF Assist” can be found under the Gear tab in the main camera menu, Section 1. And last but not least, “Peaking Level” and “Peaking Color” can be found under Section 2 of the same Gear tab (Second from the left) camera menu. I recommend that you set the color to Red and strength to Medium or Low. I find that white and yellow blend too much into most scenes that I photograph and the “High” setting is simply too much for a 3 inch LCD screen.
Let Eye AF Change Your Life
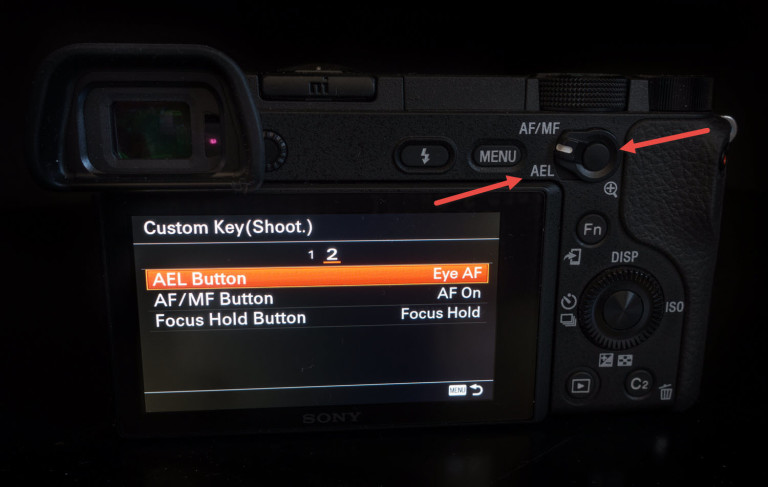
Easily one of my favorite features found in Sony impressive line of mirror-less cameras is what is know as “Eye AF.” Coincidentally it works as advertised. When enabled, the camera’s AF system automatically looks for your subjects eyes and tracks them using the continuous AF system (regardless of what mode you are currently in). This is done by assigning “Eye AF” to a custom button on your camera, so that when you hold down the button the feature begins to work its magic. Gone are the days when you just barely miss focusing on the eyes of your child and instead get their ear or nose. My success rate for eyes being perfecting in focus with my travel/humanitarian portrait work grew rapidly when Sony started implementing this feature into its cameras.
Customize your a6300
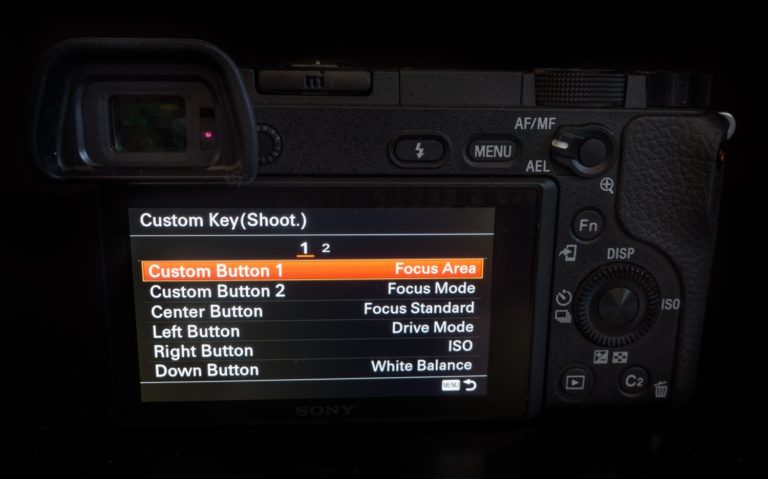
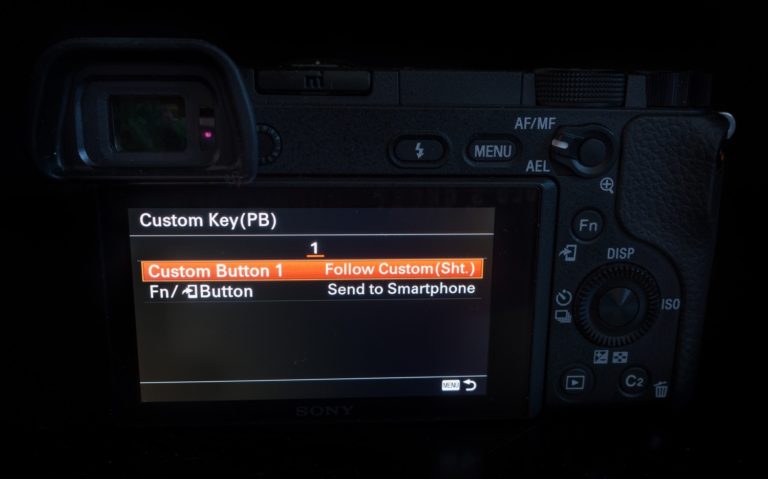
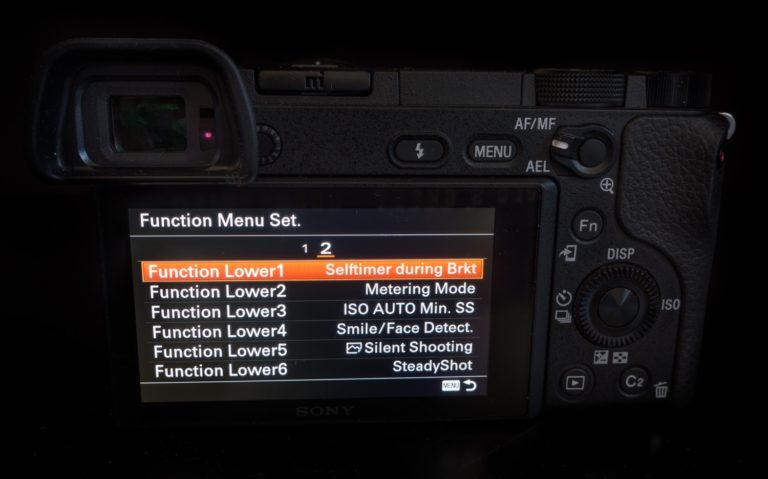
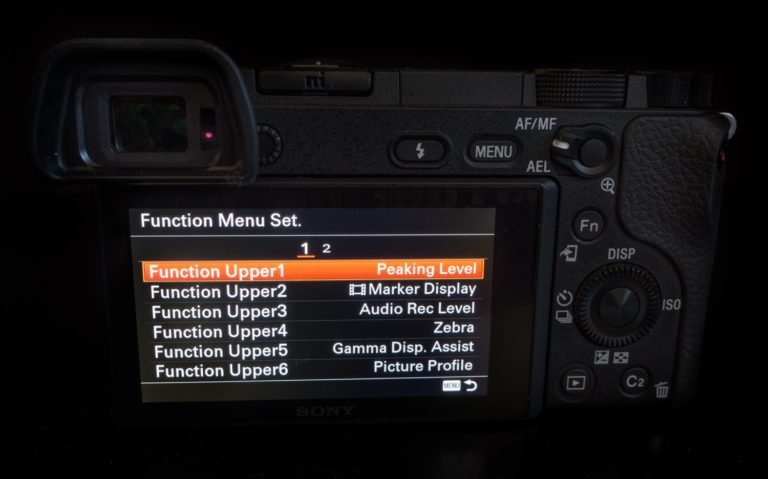
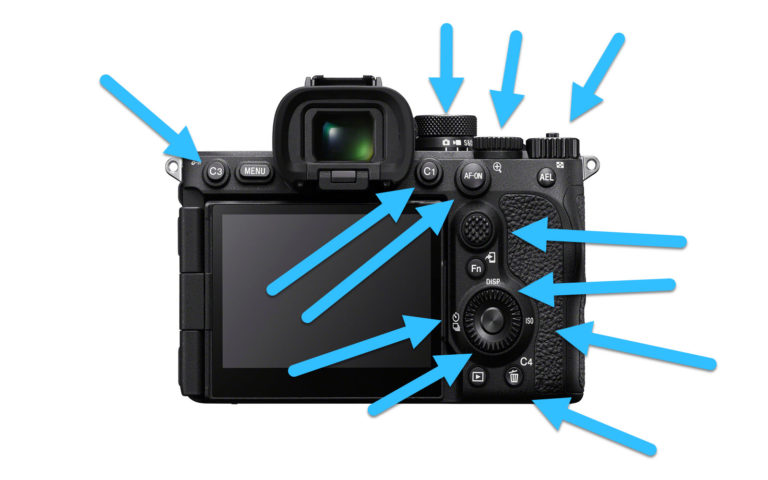
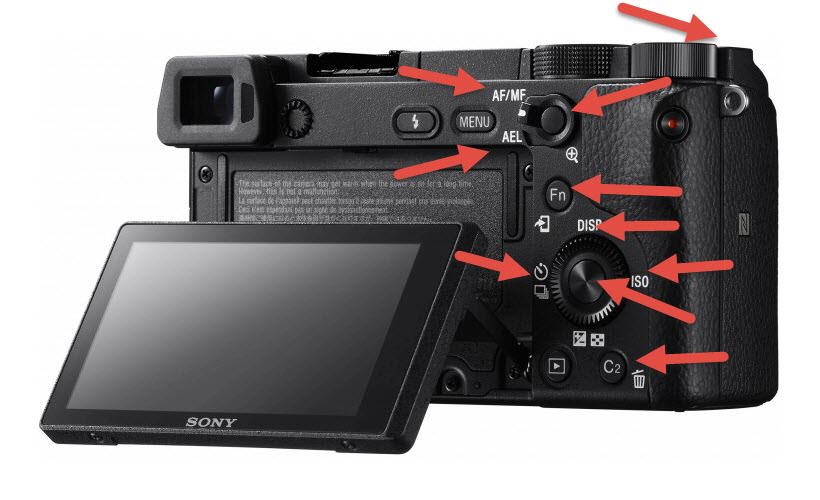
One of the best ways to truly enjoy your experience with the Sony a6300 is by changing the function of the buttons on your camera to your liking. Do you find yourself constantly digging through the menu system for a setting I mentioned in this article? Try setting it to one of the custom buttons, the back wheel or if we are honest…nearly just about any button on the camera. Also, you can also control which items show up in the “Function Menu” when you press the “Fn” button on the back of your camera. There is no universal “right” way to set up these buttons, so be prepared to experiment to find what setup works best for you!
Turn off Audio Signals
Stop Taking Photos Without An SD Card
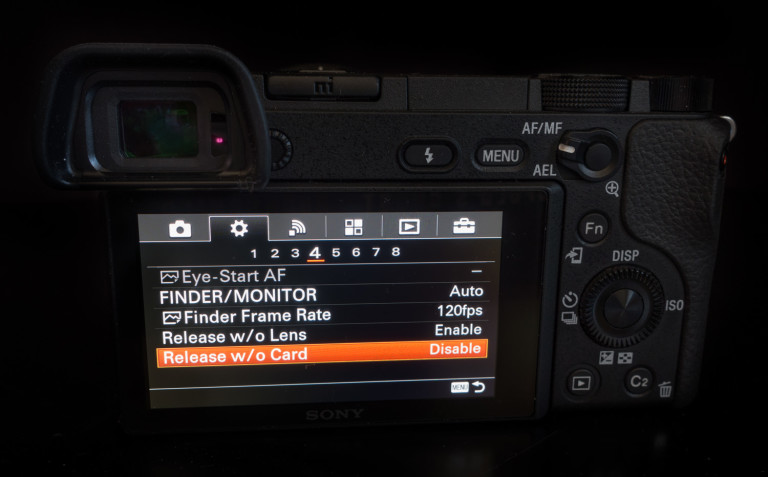
Please raise your hand if you have ever picked up your camera and started shooting, only to realize that you hadn’t put a new SD card in the slot? I can’t be the only one raising my hand! Can I? 😉 Regardless, Sony’s cameras have a setting that makes it impossible to take a photo if no card is found in the slot.
Tips for Action Photography
While the camera can shoot just about anything, Sony is positioning the a6300 as an action camera in many ways. With its brand new 24.2 MP APS-C crop sensor, 425 phase detection based AF points and 11 fps….this shouldn’t be a surprise. But how do you prepare your a6300 to perform expertly in these situations? These six settings will help get started in the right direction!
Track Moving Subjects with Ease
One of the first things you will want to do is change the Focus Mode from “AF-S” (Single-shot AF) to “AF-C” (Continuous AF). This is vital if you are photographing a moving subject. If your subject is not moving around or stops moving on occasion, you can experiment with “AF-A”, otherwise known as Automatic AF. In this mode the a6300 attempts to adjust its AF mode for you, allowing you to use the same AF mode for a still subject that might end up moving.
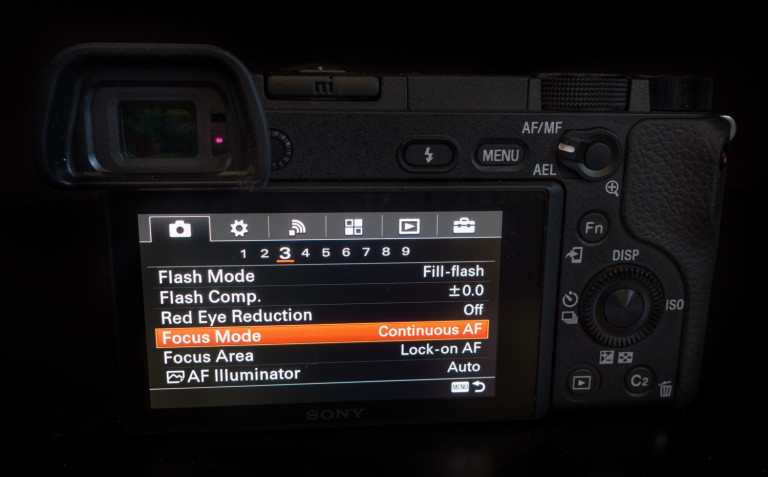
To change your AF mode, you can access the “Fn” menu and select AF-S (default) and change it as needed. Additionally, you can enter the menu system under the Camera tab and move to Section 3. Under “Focus Mode” you can make any necessary changes.
Make your EVF Feel Like An Optical Viewfinder
One of the biggest issues that sports and wildlife photographers have had with mirrorless cameras are the trade-offs in using an electronic viewfinder. While it is awesome that you get to see what your image will look like in real time (in terms of exposure), EVFs have historically suffered from frame gaps when shooting at high FPS (such as the 11FPS found on the a6300). Typically you would see small black/blank frames in between each image being captured, which often made it difficult to predict where a subject was moving. This is no longer the case. When you use one of the brand new “Continuous Shooting” drive modes, the a6300 will display your scene in a much smoother and more optical/non-EVF way. While I prefer to use the “Hi+” mode as it continuously shoots at maximum speed (11fps) while mimicking the look of an optical viewfinder, you can experiment with Lo, Mid and Hi (8 fps) modes as well.
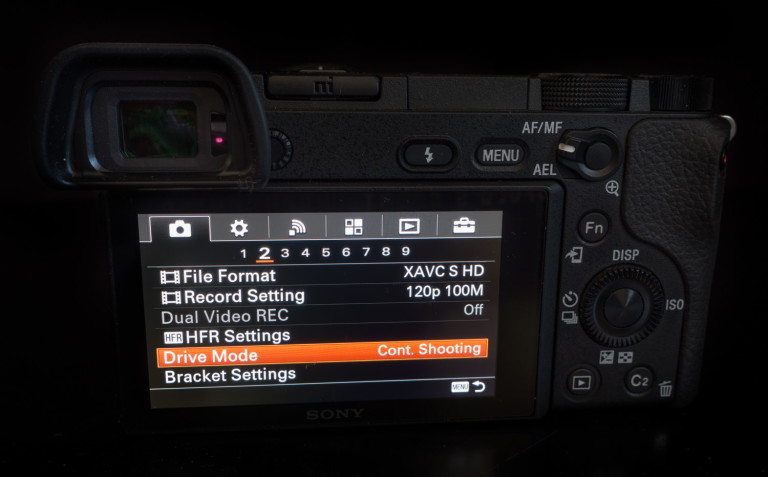
To adjust these settings, jump to the camera menu and head to the Camera tab and on to Section 2. Drive mode can be found at the bottom of the menu. You can also hit the left button on the back control wheel (with default custom buttons) to enter the drive mode selection. Continue to press either left or right on the rear wheel to select the right mode you want to use.
No More Ghosting With The EVF
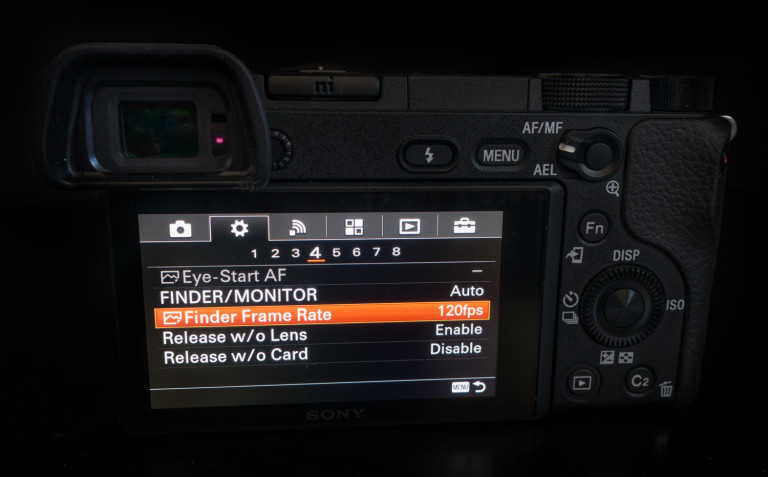
Because mirror-less cameras use EVF (Electronic Viewfinders), they would often suffer from issues with refresh rates and ghosting when subjects moved fast through the frame (an issue not found with optical viewfinders). Historically this has been much more of an issue when shooting wildlife and sports photography. Fortunately, Sony has a solution for the first time in an A-series mirrorless camera. You can now adjust the “Finder Frame Rate” from 60fps to 120 FPS. This drastically smooths out the viewing experience when shooting moving subjects!
Find the Right Focus Area Mode For You
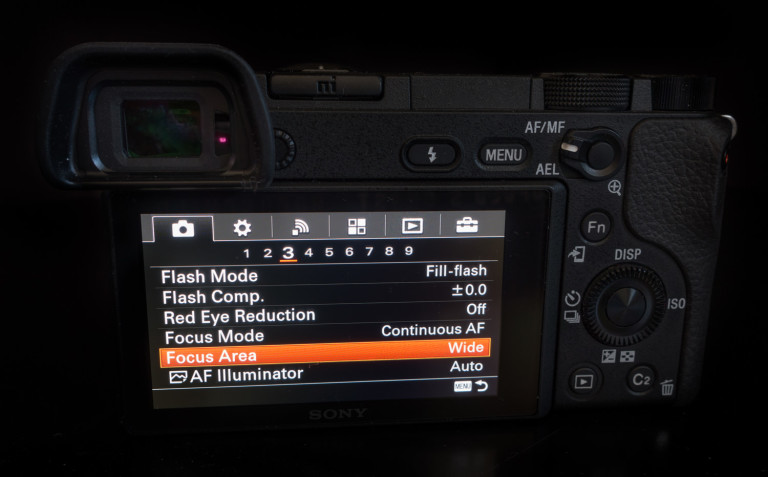
It shouldn’t be a surprise that one of the key elements to capturing great images of subjects in motion is your cameras AF system. This includes choosing the right Focus Area, so your camera knows where to find your subjects. Because the Sony a6300 has an impressive 425 phase detection based AF points the fill up close to 100% of your entire frame, using the “Wide” focus area will often provide pretty great results. Additionally, Zone, Center, Flexible Spot and Expand Flexible Spot will give you a finer granular control over your focus points. However, some of my favorite options are found in the “Lock-on AF” settings. At the bottom of the Focus Area menu, you will find Lock-on AF: Wide, Zone, Center, Flexible Spot (Small, Medium, Large) and Expanded Flexible Spot. The “Lock-on AF” options excel when you want to isolate a single moving subject from others, such as a quarterback in a football game or someone running a race.
Video Focused Tips
The Sony a6300 is an incredibly powerful stills camera that costs less than $1000 USD, but it also shines when it comes to shooting video. Check out these seven tips to help you on your way to creating the next viral video with the a6300!
Enjoy the Benefits of 4k Video
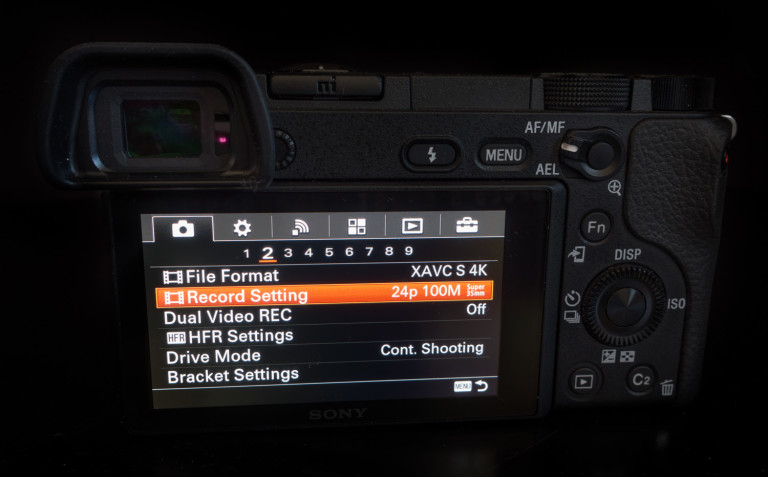
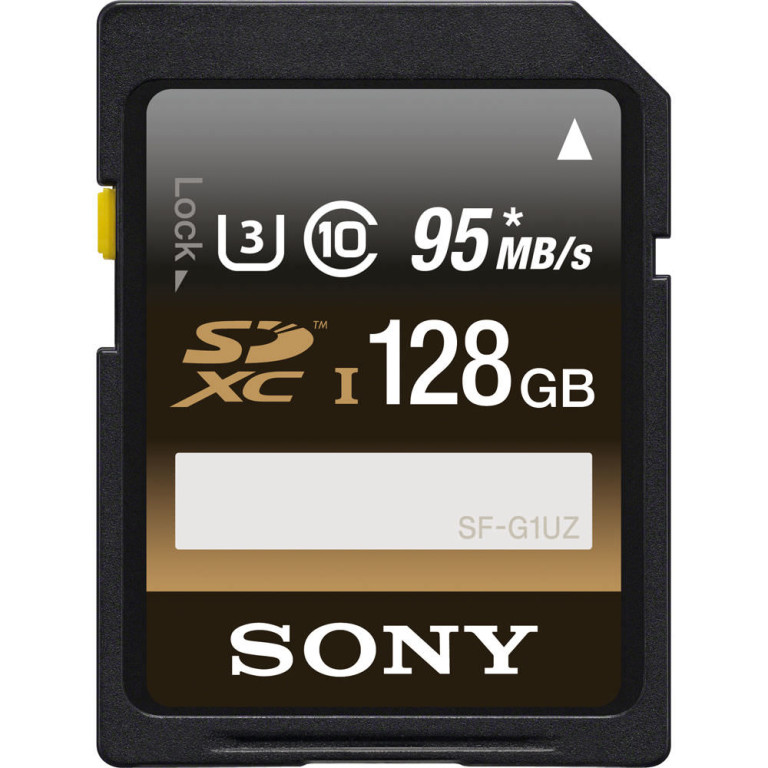
A feature a lot of people are going to be excited by is the fact that you can shoot internal 4k video with the a6300. This makes it the smallest Sony camera with interchangeable lenses to do so. While some people might balk at the idea of shooting 4k, many film makers are taking advantage of the resolution of 4k video, even if their final video is outputted at 1080p. Why? Because it looks so much better! To start shooting 4k, you need to do two things. First, make sure you are using an SD Card that is UH 3 rated. This is needed for the higher data transfer rates required for 4k video capture. Second, make sure you have “XAVC S 4k” selected in the video file format mode. Default is 1080p.
Experiment With Slow Motion HD Video
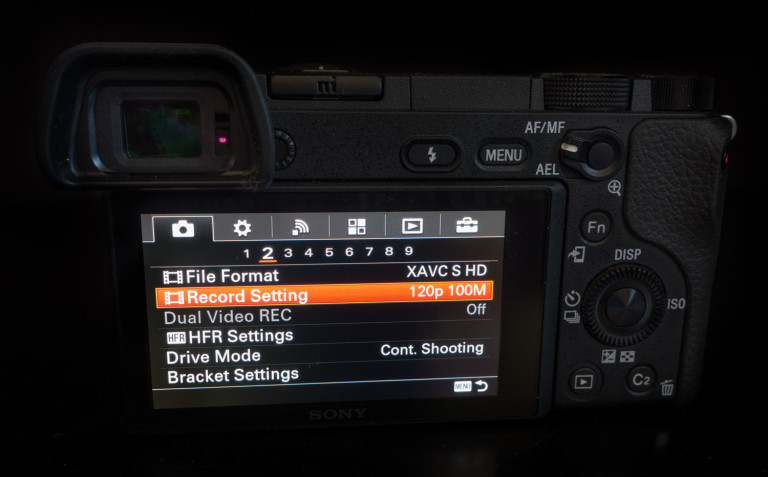
One of the exciting new features to hit the a6300 is not only the ability to shoot 4k video internally but slow motion HD video as well. While you won’t be producing slow motion videos that compare to a Phantom or Red Epic, the new 120 fps HD mode to allow for quite a bit of creative freedom.
Change Your Camera Mode When Shooting Video
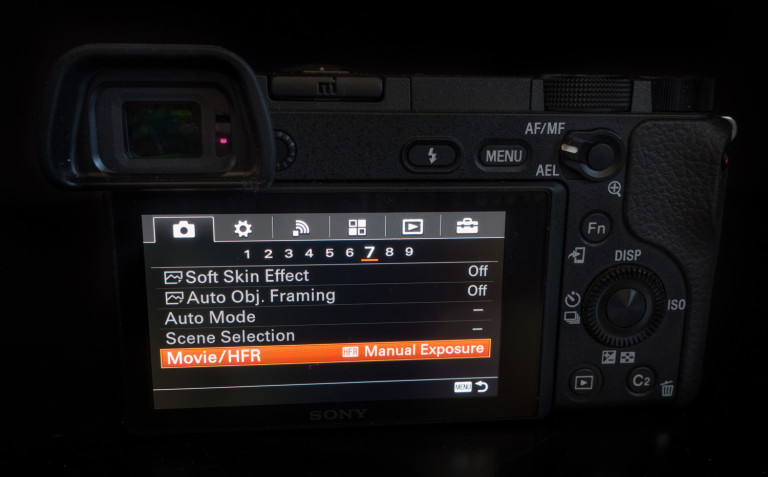
By default, your camera will be set in the “Program Auto” mode when you change your camera mode to “Movie”. If you want to have better control of the exposure of your video (or you simply wish to experiment) you have found the right settings.
Get Better Dynamic Range with S-LOG
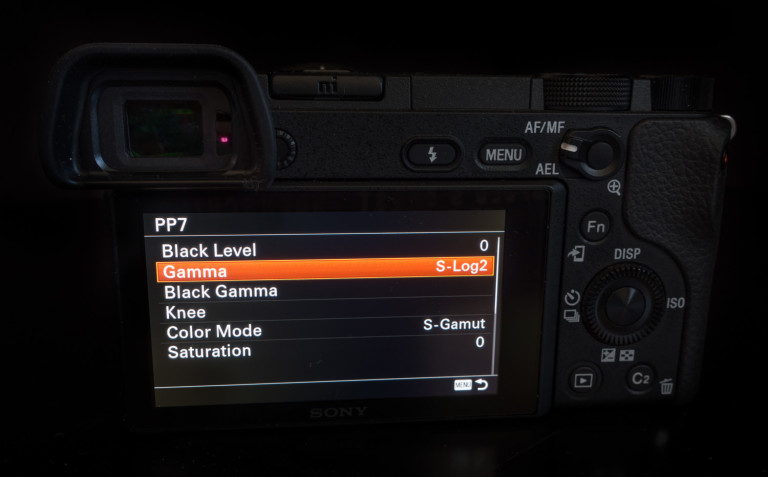
Video shooters are rejoicing at the fact that such a small and lightweight mirrorless camera can take advantage of advanced features such as having the ability to shoot in not only S-Log 2 but S-Log 3 as well with the Sony a6300. So what is S-Log? It is a popular “Picture Profile” that allows you to capture an incredible amount of expanded dynamic range in a video. While any video using S-Log 2 or S-Log 3 will look incredibly flat straight out of the camera, the magic happens during post processing/grading of your video. There you will see a huge difference in how much video image data is preserved in your highlights, mid-tones, and shadows. It is, however, important to note that the minimum ISO you can use when selecting an S-Log picture profile is 800, forcing you to use various ND filters when shooting during the middle of the day.
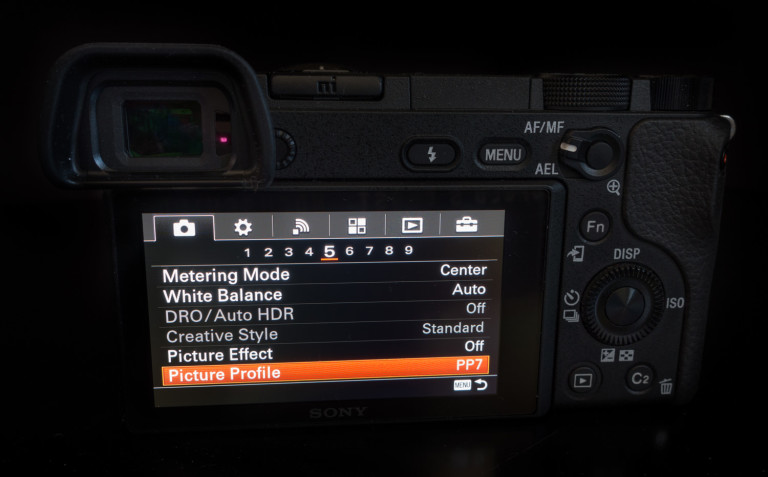
To enable S-Log 2 or S-Log 3 you need to turn on Picture Profiles. Found in the Camera tab (far left), under Section 5, you will see “Picture Profiles.” Scroll down to “PP7” and select it. By default, this will turn on the S-Log 2 Picture Profile (forcing your ISO to be 800 or higher automatically). To enable S-Log 3, go back to “PP7” in the menu and hit the right button on the rear wheel. Under “Gamma” you can change it from S-Log 2 to S-Log 3 if you wish.
Don’t Accidently Start Recording a Video
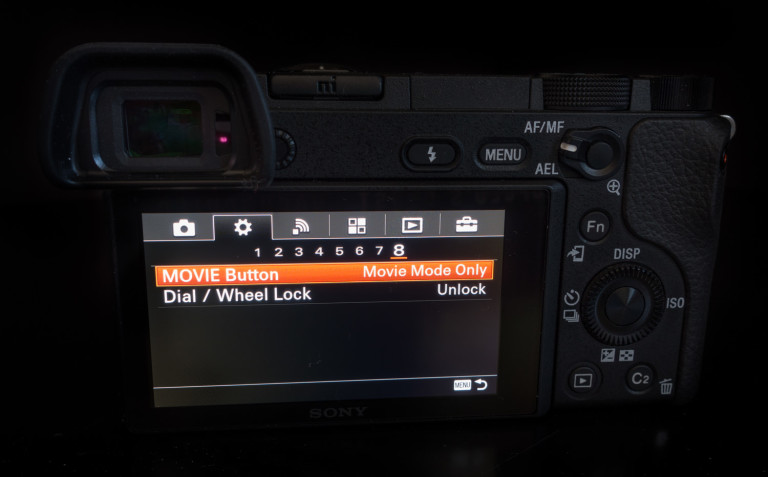
As a Sony shooter, it can be frustrating to accidently hit the video record button when shooting stills, especially with it being located so close to your natural thumb position. This can cause you to miss “the moment” by accident. Luckily Sony has a solution. You can turn off the function of the Video Record button so that it only functions when you are in the “Video” camera mode.
Use AF in Movie Mode
While most video professionals will stick with using manual focus for their video work, the a6300 has some features that make it rather unique, especially for a sub $1000 camera. I will let Dan Chung of highly popular Newsshooter blog explain it better than I can…“For the first time, a $1000 compact system has a rapid phase detection autofocus system that works in video mode. This is hugely significant because it brings the technology to a much lower price point than the likes of the Canon C100 mkII or 1D X mkII. Now just about every video journalist or wannabe documentary maker can afford it.”Once in the Movie camera mode, you will have to experiment with the “Focus Area”, “AF drive speed” and “AF Track Sens” settings. I recommend starting with the Wide or Zone Focus Areas and “High” AF Tracking Sensitivity. With “AF drive speed”, you will want to adjust this depending on how fast or slow your subject is moving. “Fast” is great for active scenes such as sports or kids playing where “Slow” will offer a smoother focus shift when moving to a new AF area in your scene. Unfortunately Sony’s menu system make it a bit too cumbersome to use the flexible spot Focus Area as changing the focus point on the fly simply takes too long. Maybe one day soon we will see touch screen support to help with situations like this.
Optional 3rd Party Accessories
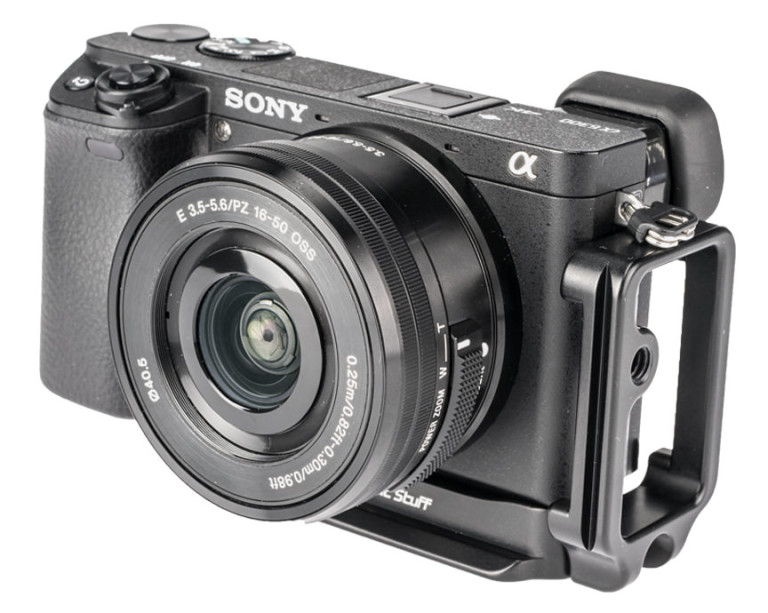
While I am technically counting all of these accessories as a single “Tip”, each has their merits on their own, even if they apply to all Sony Mirrorless Cameras and not just the a6300.
UHS-I U3 Compatible SD Memory Cards
L Bracket
Wireless IR Remote
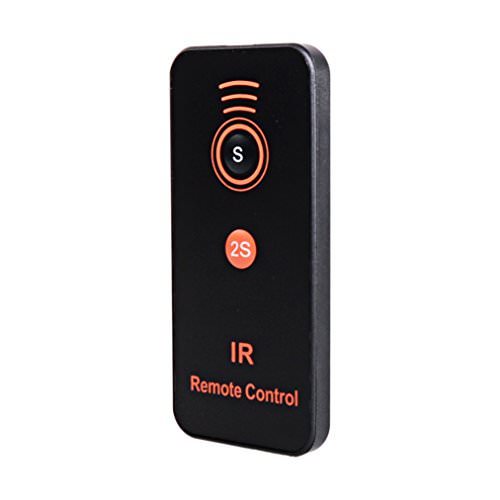
Another great accessory for any tripod using photographer is a wireless remote. While you can shell out the cash for Sony’s wired or wireless remotes, I prefer to save a bit of money and pick up a pair of Foto & Tech IR remotes off Amazon ($10.99 US). They work incredibly well and are not expensive. What’s not to love?
Screen Protector
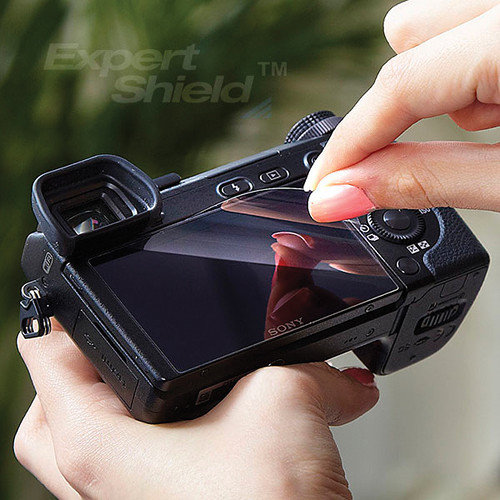
If you are keen on re-selling your gear when something new comes out, you will want to try to keep your gear in as good as shape as possible. A simple screen protector can help keep your rear LCD screen looking brand new when it is time to sell it a year or two down the line. While Sony makes screen protectors that work, I have always preferred Expert Shield. They are easy to put on and are well worth the small investment!
Sony Camera Apps
Ask Me Anything
If you have any questions about the Sony a6300 or how to set it up, please let me know in the comments section below. Additionally, if you feel I missed something, feel free to share that with everyone as well!

